This guide how to start a Shopify store will take you through every step to set up and launch your own online store smoothly.
What You’ll Learn:
- Creating Your Shopify Account: We’ll walk you through the sign up process and show you the benefits of using Shopify’s free trial.
- Choosing Your Niche and Products: How to find your target audience and products that fit the market.
- Branding: What are the elements of branding, from logo to color scheme.
- Setting up Your Store on Shopify: Overview of Shopify’s admin panel, order management and customer interaction.
- Payment and Shipping Options: Payment gateways and shipping strategies on Shopify.
- Legal Compliance: Make sure your store is compliant with data protection and email marketing regulations.
- Testing and Launching: Why testing is important before going live and how to promote effectively.
- Performance and Iteration: Sign up to Shopify to get analytics tools to track your store performance.
This beginner ecommerce store guide will walk you through the steps to launch your first Shopify store.
Follow along and you’ll be ready to start your online store journey.
How to Start a Shopify Store
1. Creating Your Shopify Account
First step is to create an account on the Shopify platform.

Here’s how to get started:
Sign Up to Shopify:
- Go to Shopify website.
- Click the “Start free trial” button.
- Enter your email address, password and online store name. The store online name will be part of your store’s URL but can be changed later.
- Click “Create your store”.
Initial Setup:
- Fill in the required information about yourself and your online store such as business address and contact information.
- Answer a few questions about your business experience and goals so Shopify can tailor its resources for you.
Go to Your Dashboard:
- Once you’ve completed the initial setup you’ll be taken to your Shopify dashboard where you can manage everything about your online store.
It’s easy, even for a beginner to sign up.
Free Trial Benefits

Shopify offers 3 days for free trial and enjoy 3 months of Shopify for USD 1 / month – which has several benefits:
- Risk Free: Try out all the features and functionalities without committing financially.
- Time to Build: Use these 3 days to set up your store completely—from adding products to customizing themes—before going live.
- Try it Out: See if Shopify fits your ecommerce website needs and can switch plans if needed.
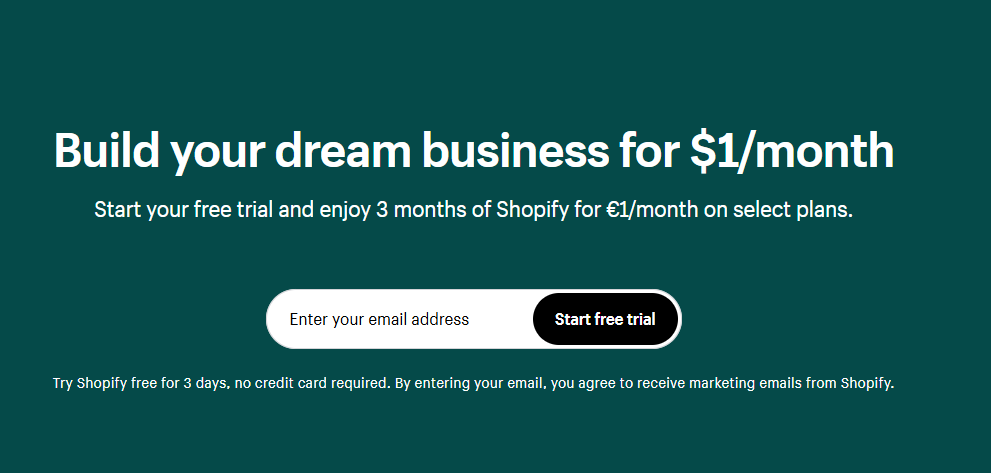
You have plenty of time to get to know the platform for USD 1 per month three months and be ready for launch really live.
2. Choosing Your Niche and Products
Choosing the right niche is important when you sign up to Shopify.
A clear target audience means your marketing will be effective and you can attract and retain customers.
Target Audience
Knowing your target audience will help you tailor your products and marketing to their needs.
Consider:
- Demographics: Age, gender, income level
- Psychographics: Interests, lifestyle, values
- Behavioral Aspects: Buying habits, brand loyalty
By focusing on a specific group you can create more products to sell that are personalized and appealing.
Niche Selection Methods
There are two ways to select a niche: personal interests and market trends.
- Personal Interests Choosing a niche based on your passions makes the business more fun.
- You have knowledge in the area.
- Example: If you love fitness, sell gym equipment or activewear.
- Market Trends Analyze current market trends to find profitable niches.
- Use tools like Google Trends, social media insights and market research reports.
- Example: If eco-friendly products are trending, sell sustainable products.
Both approaches combined usually gives the best results. Start with what you’re interested in and validate it through market research to see if there’s demand.
When choosing products to sell focus on products that solve problems or fulfill needs of your target audience. This increases the chances of more sales and customer satisfaction.
3. Branding
A strong brand identity is key to your Shopify store’s success.
This includes several elements that work together to create a cohesive and recognizable brand.
Elements of Branding
- Logo Design:
A logo is crucial. It should be unique and reflect your store’s personality. Use Canva or Adobe Spark to design a professional looking logo even if you’re not a designer. - Color Scheme:
Choose a color palette that resonates with your target audience and your products. Consistency in colors across your website, social media and marketing materials helps in building brand recognition. - Typography:
Choose fonts that are readable and match your brand’s tone. Don’t use too many fonts; stick to two or three that go well together. - Imagery:
High quality images matter for your brand. Use consistent styles for product photos, banners and other visual elements to maintain a cohesive look. - Voice and Tone:
Define your brand’s voice. Whether it’s formal, casual or quirky, consistency is key. This voice should be present in all written content, from product descriptions to blog posts.
Spend time on these branding elements to make your Shopify store stand out and attract your target audience.
4. Setting up your Shopify Store
Admin Panel Overview and Features
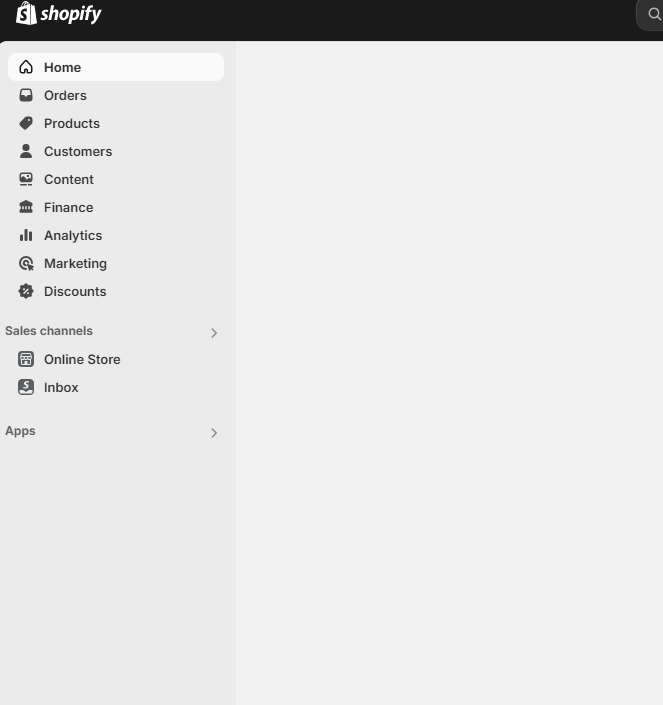
Once you sign up for Shopify and take advantage of the 3 day free trial you’ll be introduced to the Shopify admin panel.
This is your control center where you manage everything in your online store.
Key features of the Shopify admin panel:
- Dashboard: A snapshot of your store’s performance including sales data, traffic insights and recent activity.
- Orders: Manage everything related to order processing here, from viewing new orders to updating status.
- Products: Add, edit and organize your products here. You can upload images, write descriptions, set prices and manage inventory.
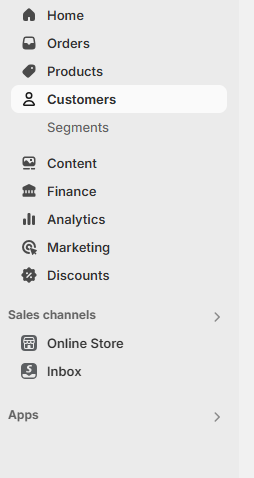
- Customers: View customer information and segment your audience for targeted marketing campaigns.
- Analytics: Get detailed reports on sales, customer behavior and more to inform your business decisions.
The Shopify store admin panel is designed to be easy to use even for beginners. As you get familiar with these features you’ll find it gets easier to navigate and use it more.
Why Order Management and Customer Interaction Matters
Order management is key to a smooth operation.
In the orders section of the admin panel:
- Order Status Updates: Track orders from placement to fulfillment. Update status to ‘paid’, ‘shipped’ or ‘delivered’.
- Customer Notifications: Automatically send emails to customers about their order status. This keeps them informed and builds trust.
- Refunds and Returns: Process refunds from the order details page if needed.
Understanding how to interact with customers is just as important.
The customers section lets you:
- Segment Customers: Create groups based on purchase history or other criteria for targeted marketing.
- Customer Profiles: View individual customer behaviour to personalize interactions.
Inventory management is another important part.
In the products section:
- Inventory Levels: Set stock levels for each product variant (size, color). Get notified when stock runs low.
- SKU Management: Assign Stock Keeping Units (SKUs) to track products.
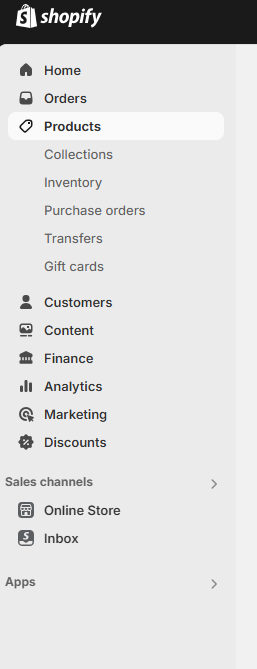
These features are key to running your store efficiently. They allow you to serve your customers on time and keep your operations streamlined.
By using the Shopify store admin panel’s order, inventory and customer interaction features you’re already on your way to running a successful online store.
Customizing your store and adding products
Sign up for Shopify and take advantage of the 3 day free trial to try out different customization options with no commitment. One of the first things you’ll do when setting up your online store is choosing a theme from the Shopify Theme Store.
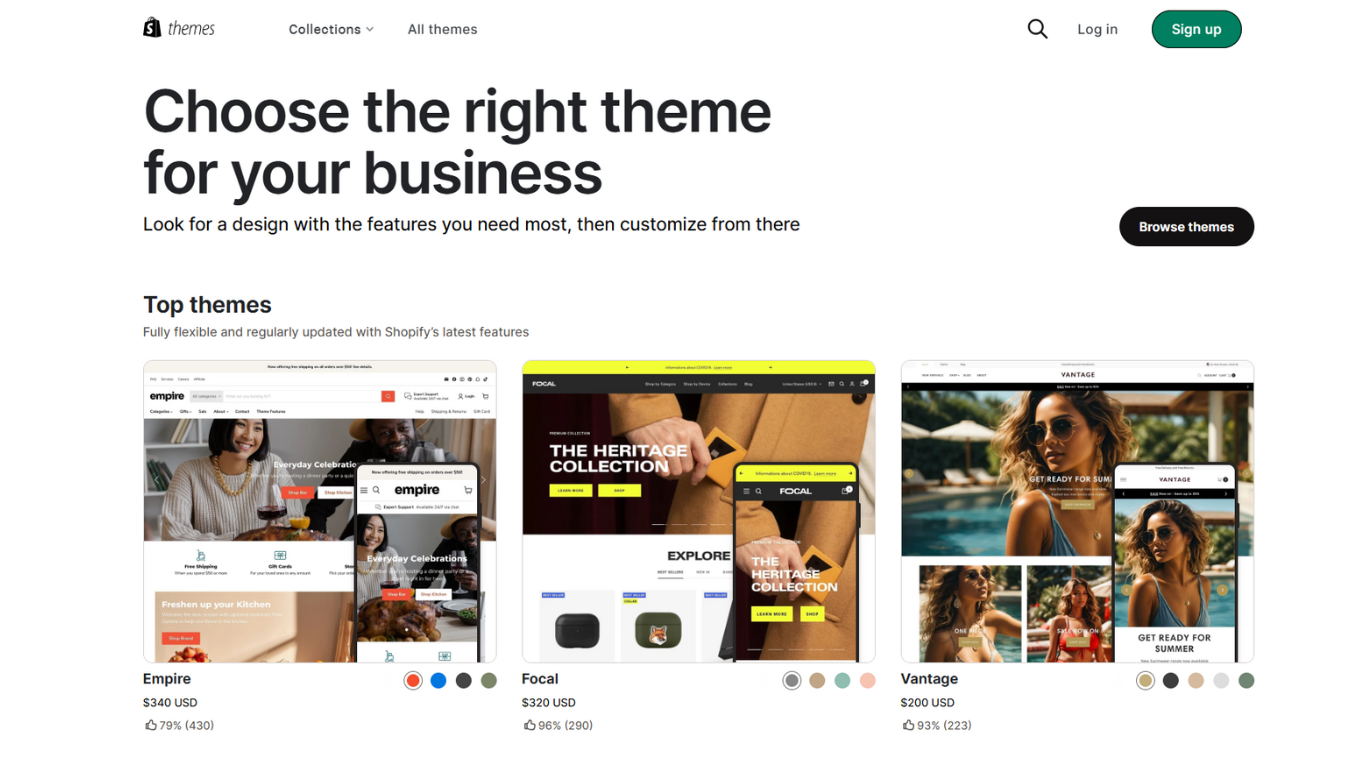
Here you’ll find free and paid themes for different types of businesses.
Theme Store Options
- Free Themes: For beginners on a budget. Basic customization options and easy to set up.
- Paid Themes: More advanced features and design flexibility. Often comes with extra functionality to enhance user experience.
Once you’ve chosen a Shopify store theme it’s time to customize it to your brand using the Shopify Theme Editor.
This tool lets you:
- Change colors and fonts
- Add or remove sections
- Layouts
- Upload logo
Adding Products
Adding products is a big part of setting up your online store.
Follow these steps to present your products well:
- Go to Products: In your Shopify admin panel go to “Products” and click “Add product”.
- Product Title and Description: Enter a clear title for your product. Write a detailed description of the product’s features, benefits and usage.
- Pricing: Set your product price. You can also include a compare at price to show discounts.
- Images: Upload high quality images from multiple angles. Make sure they are well lit and show the product well.
- Inventory: Enter SKU (Stock Keeping Unit) numbers, barcode info and track inventory levels. This helps with stock management.
- Shipping: Enter weight if needed for shipping calculations.
- SEO: Customize the URL handle, meta title and meta description to improve search engine visibility.
By customizing your online store theme and adding detailed product info you’re creating a great shopping experience for your customers.
Now you’re ready to move on to setting up payment options and other important parts of your Shopify store.
5. Payment Options and Shipping Settings
Payment Options on Shopify
Shopify has multiple payment gateways to suit different preferences and regions.
The main options are:
- Shopify Payments: Shopify’s built in payment solution, simplifies the process by removing the need for third party processors. Supports major credit cards and competitive transaction fees.
- Third party Processors: If you prefer or need alternatives Shopify has over 100 third party payment gateways like PayPal and Stripe. These offer flexibility but may have extra transaction fees.
To set up payment options:
- Log into Shopify: Make sure you’re logged into your Shopify account.
- Go to Settings > Payments.
- Choose your payment method and follow the setup instructions.
Shopify Payments simplifies things, third party processors give you flexibility if you need it.
Shipping
Shipping is a big part of your ecommerce store, customer satisfaction and operational efficiency.
Consider these shipping strategies:
- Free Shipping: Free shipping can increase conversions. Absorbing shipping costs or including them in product prices are common methods.
- Flat rate Shipping: This method simplifies shipping costs by setting a fixed rate regardless of order size or weight. Easy for customers to understand and predict but may not always cover actual shipping costs.
To set up shipping strategy on Shopify:
- Go to Settings > Shipping and Delivery.
- Set up your Shipping Zones, which regions you want to ship to.
- Set Shipping Rates, choose free, flat rate or calculated rate based on weight or order value.
You can also combine different methods—offer free shipping for orders above a certain amount and flat rate for others.
Setting up payment gateways and shipping details options right will give your customers a smooth checkout experience and build trust and repeat business.
6. Legal Compliance for Your Store
Running an online store has many legal requirements you need to address to be compliant and build trust with your customers.
Data and Privacy
- GDPR: If you’re targeting customers in the European Union GDPR (General Data Protection Regulation) is non negotiable. This means transparent data collection and getting explicit consent from users before collecting their personal info.
- Email Marketing: Make sure your email marketing is compliant with laws like CAN-SPAM in the US or similar laws elsewhere. Always give customers an easy way to opt out of your emails.
Sales Tax
- Sales Tax Collection: Understanding sales tax is key. Depending on where your customers are located you may need to collect and remit sales tax. Shopify has tools to automate tax calculations based on customer location.
- Tax Settings in Shopify: Go to the “Settings” tab in your Shopify admin to set up your tax settings. This includes setting tax rates for different regions and making sure you’re compliant with local tax laws.
Legal Pages and Policies
Create your legal pages like Privacy Policy, Terms of Service, Shipping & Returns Policy, Cookie Policy. These pages inform your customers about your business and protect you from legal issues.
Legal compliance can seem overwhelming but it’s a necessary step to having a trustworthy online store presence. By addressing these legal bits from the start you’re setting up your Shopify store for success.
7. Testing and Launching
Make sure everything works before you go live. Here’s how you can test your Shopify store:
1. Product Pages
Check all product titles, descriptions, images and prices are correct. Make sure variants like sizes or colors display correctly.
2. Navigation and UX
Go through your online store to see if menus, categories and collections are easily accessible. Test the search function.
3. Payment
Test transactions using Shopify’s test mode. Simulate different payment methods to make sure customers can complete their purchase without issues.
4. Mobile Optimization
Use multiple mobile devices to confirm your store’s responsiveness. Ensure text, images, and buttons are properly aligned and functional on smaller screens.
5. Shipping
Make sure all shipping rates and options are calculated correctly during checkout.
6. Customer Communication
Test automated emails for order confirmations, shipping notifications and customer inquiries.
You have 3 days free trial to sort out any issues before removing the password. Once you’re happy with the setup go live.
Promoting Your Store After Launch
Once your Shopify store is live, promoting it well is key to getting customers and sales. Use digital marketing to do that.
Social Media Advertising
Social media platforms like Facebook, Instagram and Pinterest have robust advertising tools that allow you to target specific demographics.
You can:
- Create targeted ads: Advertise to users based on their interests, behaviors and location.
- Engage with followers: Post regularly to build a community around your brand.
- Use influencers: Partner with influencers to reach more people and credibility.
Email Marketing
Build your email list from day one so you can communicate directly with potential and existing customers.
Email marketing strategies includes:
- Welcome emails: Send automatic welcome emails to new subscribers to introduce your brand.
- Promotional campaigns: Offer exclusive discounts and promotions to encourage sales.
- Abandoned cart reminders: Remind customers of items left in their cart to recover lost sales.
SEO
Optimize your Shopify platform store for search engines so customers can find your products.
SEO includes:
- Keyword research: Find the keywords your target market is searching for.
- On-page SEO: Optimize product titles, descriptions and meta tags with keywords.
- Content marketing: Write blog posts and guides that are valuable and drive organic traffic.
Promoting your Shopify store effectively is a combination of these digital marketing methods. Use social media advertising, email marketing and search engine optimization to get a constant stream of customers.
Build Your Email List from Day One
Building your email list from day one is key to your successful Shopify store.
It allows you to communicate directly with potential customers, nurture relationships and drive repeat sales. When you sign up for Shopify and take advantage of the 3 day free trial start collecting email addresses now.
Why build your list early?
- Direct Communication: Email marketing is a direct line to your customers’ inboxes. Unlike social media where algorithms control visibility, your emails go straight to your subscribers.
- Personalization: Customize your messages based on customer behavior and preferences. Personalized emails can boost engagement and conversion rates.
- Ownership: Unlike followers on social media you own your email list. That means you control how and when you communicate with your audience without relying on third-party platforms.
How to do it:
- Sign-Up Forms: Use sign-up forms on your website to capture visitor information. Place these forms in prominent places like the homepage, product pages and blog posts.
- Lead Magnets: Offer discounts, free shipping or exclusive content in exchange for email addresses. This will encourage visitors to subscribe to your list.
- Pop-Ups: Use exit-intent pop-ups that appear when a visitor is about to leave your site. Offer a special deal or valuable content to sign up.
- Social Media Integration: Promote your email list on social media. Use call-to-action buttons on Facebook or Instagram bios to link to your sign-up form.
By doing these Shopify email marketing methods you’ll have a solid foundation to communicate with your customers from day one.
8. Track and Iterate Based on Feedback
Sign up for Shopify to get access to a full suite of analytics tools to track your store’s performance. These tools will give you insights into sales data, customer behavior and overall business health.
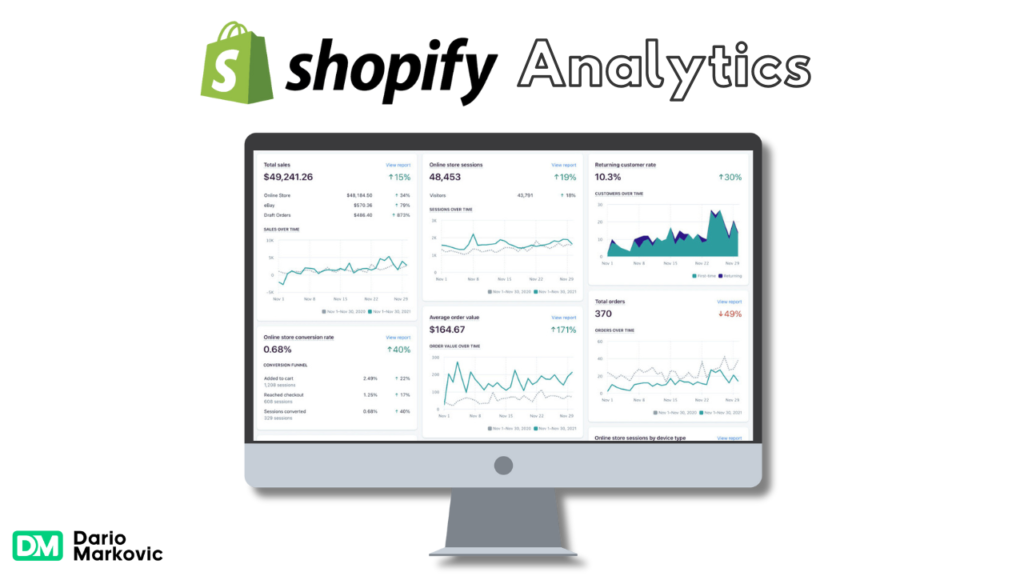
Shopify Analytics Tools
Shopify has built-in analytics to make tracking easier:
- Sales Data: Track total sales, average order value and conversion rates. This will help you identify trends and optimize pricing.
- Customer Behaviour Insights: See how customers interact with your store. Track page views, session duration and bounce rates to improve user experience.
- Traffic Reports: See where your traffic is coming from—organic search, social media, email campaigns—to allocate your marketing budget.
Example: If you see high organic traffic from social media but low conversion rates, maybe it’s time to refine your social media strategy or improve the landing pages linked from these platforms.
Sales Tracking
Accurate sales tracking is key to understanding your store’s financial health.
Shopify’s dashboard has sales channels reports:
- Product Performance: See which products are top sellers and which are underperforming. This will help you adjust inventory and marketing.
- Sales Over Time: Track sales over days, weeks or months to forecast future performance and plan promotions.
- Customer Segmentation: Segment customers based on purchase behaviour (e.g. repeat buyers) to target marketing and retention.
Example: If repeat buyers are a big revenue generator, consider implementing a loyalty program to encourage more purchases.
Iterate Based on Feedback
Customer feedback is gold for continuous improvement:
- Product Reviews: Ask customers to leave reviews. Positive reviews build trust and constructive feedback shows areas to improve.
- Surveys and Polls: Use surveys to get feedback on products, website usability and customer service.
- Social Media Listening: Monitor social media for mentions of your brand. Engage with customers directly to address issues and build community.
Example: If multiple customers are mentioning product sizing issues in reviews, consider updating product descriptions or adding a size guide.
Reviewing these analytics will help you make informed decisions how to start a online store and how to keep your store ahead of the e-commerce game.
Dario’s Conclusion
Every step from choosing your niche to designing your brand to setting up payment options is crucial to your online business.
Use Shopify’s features and user-friendly interface to bring your idea to life. Be open to learning and flexible to changes and feedback.
Launch your store today and start selling!
Remember your future growth starts today.
Frequently Asked Questions
How do I handle shipping and taxes?
Shopify has built-in tools to set up shipping rates and calculate taxes based on customer location. You can configure this in the admin panel.
Are there any extra costs I should know about?
Extra costs might be:
- Premium themes
- Third-party apps from the Shopify App Store
- Domain registration
These add extra functionality to your store.
What if I need help setting up my store?
Shopify has 24/7 customer support via live chat, email and phone. There’s also a help centre and community forums.
Can I use my own domain with Shopify?
Yes you can either buy a domain through Shopify or connect an existing domain to your Shopify store.
Is there a free trial?
Shopify has a 14 day free trial. This allows you to try the platform and set up your store before committing to a paid plan.


